
elevne's Study Note
BERT - KorQuAD (1) 본문
오늘은 BERT를 사용하여 KorQuAD 데이터셋을 분석해보는 실습을 진행해보았다. KorQuAD는 기계독해 모델을 위한 데이터셋으로, Korean Question Answering Dataset의 약자이다.
이전에 BERT로 데이터분석을 진행했을 때와 마찬가지로, 우선 데이터를 불러오고 간단하게나마 EDA를 진행해보는 시간을 가졌다. 데이터는 keras.utils 의 get_file 함수를 사용하여 가져올 수 있었다.
train_data_url = "https://korquad.github.io/dataset/KorQuAD_v1.0_train.json"
train_path = keras.utils.get_file("train.json", train_data_url)

eval_data_url = "https://korquad.github.io/dataset/KorQuAD_v1.0_dev.json"
eval_path = keras.utils.get_file("eval.json", eval_data_url)

train_data = json.load(open(train_path))
eval_data = json.load(open(eval_path))
위 데이터들은 json 형식으로 되어있기에 json.load로 불러와줘야 한다. 그 후 pprint 함수를 사용해서 데이터를 확인해보았다. pprint 라이브러리는 파이썬 내장 라이브러리로 json 데이터를 보기좋게 출력해줄 수 있게끔 해준다. 아래와 같이 결과를 확인해보았다.
import pprint
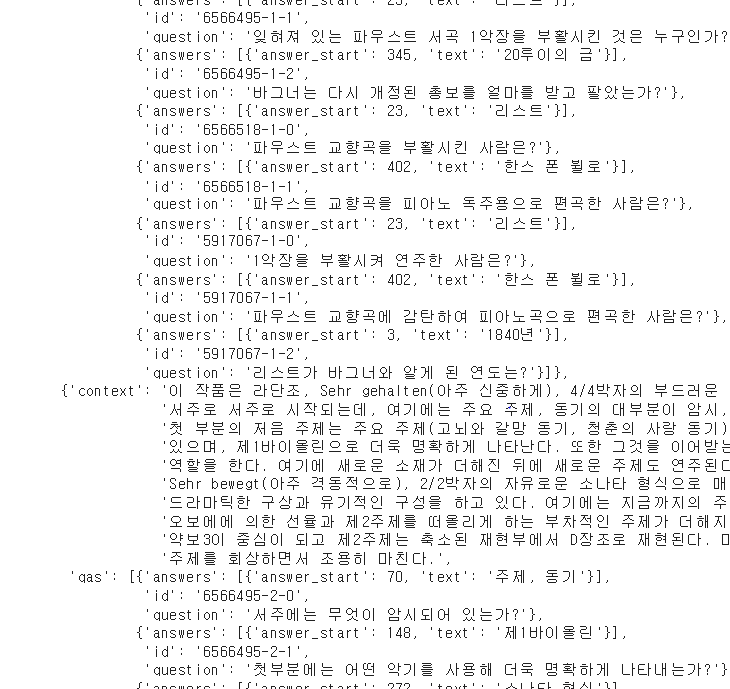
pprint.pprint(train_data["data"][0])
지금은 2.0 버전도 있긴 하지만, 2.0 데이터셋은 크기가 너무 커서 Train을 시키기가 버거울 것 같아서 1.0 version을 사용하게 되었다. 위 데이터는 크게 주제 별로 구분되어있으며, 주제 안에 지문 데이터들과 질의 응답 데이터가 들어있다. 우선 지문 데이터에 대한 분석을 간단하게 진행해보고자 하였다.
documents = list()
for d in train_data["data"]:
  documents += [p["context"] for p in d["paragraphs"]]
print(len(documents))
# RESULT: 9681

len_docs = list()
for d in documents:
  len_docs.append(len(d.split()))

print(np.max(len_docs))
print(np.min(len_docs))
print(np.mean(len_docs))
print(np.median(len_docs))
# RESULT: 2244, 7, 115, 102
위와 같은 코드로 총 지문 텍스트의 수(9681개)를 알아보고, 각 지문의 길이에 대한 분포에 대해서도 알아보았다.
이번에는 WordCloud를 사용하여 지문에 가장 많이 등장하는 단어가 무엇일지 알아보기로 하였다. 여기서는 Konlpy 라이브러리의 Okt 중 nouns 함수를 사용하여 명사에 해당하는 텍스트만으로 워드클라우드를 그려보고자 하였다. 아래와 같은 코드를 사용하였다.
from wordcloud import WordCloud
from konlpy.tag import Okt

okt = Okt()
noun_docs = list()
for d in sample_docs:
  noun_docs += okt.nouns(d)

cloud = WordCloud(font_path='/content/drive/MyDrive/Colab Notebooks/BMEULJIROTTF.ttf',
                  width=800, height=600).generate(" ".join(noun_docs))
plt.figure(figsize=(12, 5))
plt.imshow(cloud)
plt.axis("off")

하지만, 위의 Word Cloud에 그, 이, 등, 것 과 같은 의미 없는 명사 텍스트가 많이 포함되어 있는 것을 확인할 수 있었다. 그래서 사용한 방법이 List에 filter 함수를 거치게하여 의미없는 단어들을 조금 걸러내는 것이었다.
filter() 함수는 두 개의 인자를 순서대로 받는데, 첫 번째로는 Filtering의 조건이 될 함수, 두 번째로는 Filter를 진행할 순회 가능한 데이터이다. 첫 번째 조건이 될 함수를 넣는 인자 란에는 lambda 표현식을 사용하는 것이 간편할 수 있다고 한다.
nos = ['것', '수', '의', '후', '이', '등', '때', '그', '이후', '를', '때문', '뒤', '또한', '위', '개']
noun_docs2 = filter(lambda x : x not in nos, noun_docs)

cloud = WordCloud(font_path='/content/drive/MyDrive/Colab Notebooks/DScover/BMEULJIROTTF.ttf',
                  width=800, height=600).generate(" ".join(noun_docs2))
plt.figure(figsize=(12, 5))
plt.imshow(cloud)
plt.axis("off")
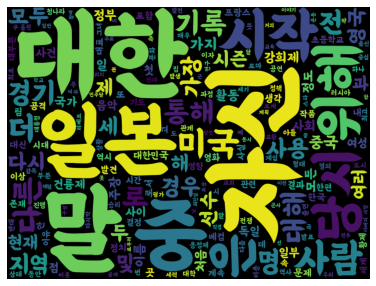
위의 filter() 함수를 거치고나니 조금이나마 더 의미가 있는 WordCloud가 생성된 것을 확인할 수 있었다.
이번에는 질문 데이터를 확인해보기로 하였다. 질문 데이터도 마찬가지의 방식을 사용하여 EDA를 진행하였다.
questions = list()
for d in train_data["data"]:
  qas = [p["qas"] for p in d["paragraphs"]]
  for c in qas:
    questions += [q["question"] for q in c]
print(len(questions))
#RESULT: 60407

len_qs = list()
for q in questions:
  len_qs.append(len(q.split()))
print(np.max(len_qs))
print(np.min(len_qs))
print(np.mean(len_qs))
print(np.median(len_qs))
#RESULT: 35, 1, 8, 7
이제 데이터에 대해서 간단히 조사해보았으니 실질적인 모델을 설계하고 학습시킬 준비를하였다.
BERT 모델에는 입력으로 다음과 같은 형태가 들어갈 것이다. "[CLS] 질문문장 [SEP] 본문 [SEP]" . 이를 고려하여 모델을 설계하면 된다. 우선 사전학습 모델을 저장하고 BERT Tokenizer을 불러온다.
slow_tokenizer = BertTokenizer.from_pretrained("bert-base-multilingual-cased", lowercase=False)
save_path = "bert-base-multilingual-cased/"
if not os.path.exists(save_path):
    os.makedirs(save_path)
slow_tokenizer.save_pretrained(save_path)

tokenizer = BertWordPieceTokenizer("bert-base-multilingual-cased/vocab.txt", lowercase=False)
위 코드를 살펴보면 slow_tokenizer에 from_pretrained 함수를 사용하여 이전에 사전학습 모델을 가져온 것처럼 정보를 가져와준다. 그 이후에, save_pretrained 함수를 사용하여 지정한 경로에 BertTokenizer의 내용을 저장해줄 수 있다. 이 때, Tokenizer의 어휘를 디렉토리에 저장하고 Huggingface에서 자동으로 추가하는 토큰 및 특수 토큰은 저장하지 않는다고 한다. Huggingface에서 제공하는 속도향상과 다양한 기능을 지원하는 BertWordPieceTokenizer를 사용하여 진행하면 데이터전처리 단계에서 Tokenize된 각 Token의 위치정보를 가져올 수 있다.
Tokenizer을 가져와주었으니 이제 사전학습 모델을 불러올 차례이다. 한국어 기계독해 모델은 다른 모델들처럼 from_pretrained 함수로 간단하게 가져오기 힘들다고 한다. 한국어 기계독해 모델을 위해서는 모델과 토크나이저 원형 정보를 따로 저장하고 저장된 정보를 가지고 사용해야 한다고 한다. pip install wget을 해준이후 아래 코드를 사용하여 다운로드를 진행해주었다.
wget.download('https://s3.amazonaws.com/models.huggingface.co/bert/bert-base-multilingual-cased-config.json', out='./bert-base-multilingual-cased/')
os.rename('./bert-base-multilingual-cased/bert-base-multilingual-cased-config.json', './bert-base-multilingual-cased/config.json')

wget.download('https://s3.amazonaws.com/models.huggingface.co/bert/bert-base-multilingual-cased-tf_model.h5', out='./bert-base-multilingual-cased/')
os.rename('./bert-base-multilingual-cased/bert-base-multilingual-cased-tf_model.h5', './bert-base-multilingual-cased/tf_model.h5')
그 후, 데이터를 학습 가능한 형태로 train data와 validation data로 나눠주기 위해 함수를 작성해줄 필요가 있었다. Class로 이를 아래와 같이 사용할 수 있다.
class SquadExample:
    def __init__(self, question, context, start_char_idx, answer_text):
        self.question = question
        self.context = context
        self.start_char_idx = start_char_idx
        self.answer_text = answer_text
        self.skip = False

    def preprocess(self):
        context = self.context
        question = self.question
        answer_text = self.answer_text
        start_char_idx = self.start_char_idx

        context = " ".join(str(context).split())
        question = " ".join(str(question).split())
        answer = " ".join(str(answer_text).split())

        end_char_idx = start_char_idx + len(answer)
        if end_char_idx >= len(context):
            self.skip = True
            return

        is_char_in_ans = [0] * len(context)
        for idx in range(start_char_idx, end_char_idx):
            is_char_in_ans[idx] = 1

        tokenized_context = tokenizer.encode(context)

        ans_token_idx = []
        for idx, (start, end) in enumerate(tokenized_context.offsets):
            if sum(is_char_in_ans[start:end]) > 0:
                ans_token_idx.append(idx)

        if len(ans_token_idx) == 0:
            self.skip = True
            return

        start_token_idx = ans_token_idx[0]
        end_token_idx = ans_token_idx[-1]

        tokenized_question = tokenizer.encode(question)

        input_ids = tokenized_context.ids + tokenized_question.ids[1:]
        token_type_ids = [0] * len(tokenized_context.ids) + [1] * len(
            tokenized_question.ids[1:]
        )
        attention_mask = [1] * len(input_ids)

        padding_length = MAX_LEN - len(input_ids)
        if padding_length > 0:  # pad
            input_ids = input_ids + ([0] * padding_length)
            attention_mask = attention_mask + ([0] * padding_length)
            token_type_ids = token_type_ids + ([0] * padding_length)
        elif padding_length < 0:  # skip
            self.skip = True
            return

        self.input_ids = input_ids
        self.token_type_ids = token_type_ids
        self.attention_mask = attention_mask
        self.start_token_idx = start_token_idx
        self.end_token_idx = end_token_idx
        self.context_token_to_char = tokenized_context.offsets


def create_squad_examples(raw_data):
    squad_examples = []
    for item in raw_data["data"]:
        for para in item["paragraphs"]:
            context = para["context"]
            for qa in para["qas"]:
                question = qa["question"]
                answer_text = qa["answers"][0]["text"]
                start_char_idx = qa["answers"][0]["answer_start"]
                squad_eg = SquadExample(
                    question, context, start_char_idx, answer_text
                )
                squad_eg.preprocess()
                squad_examples.append(squad_eg)
    return squad_examples


def create_inputs_targets(squad_examples):
    dataset_dict = {
        "input_ids": [],
        "token_type_ids": [],
        "attention_mask": [],
        "start_token_idx": [],
        "end_token_idx": [],
    }
    for item in squad_examples:
        if item.skip == False:
            for key in dataset_dict:
                dataset_dict[key].append(getattr(item, key))
    for key in dataset_dict:
        dataset_dict[key] = np.array(dataset_dict[key])

    x = [
        dataset_dict["input_ids"],
        dataset_dict["token_type_ids"],
        dataset_dict["attention_mask"],
    ]
    y = [dataset_dict["start_token_idx"], dataset_dict["end_token_idx"]]
    return x, y
우선 Class내의 create_squad_example 함수를 통해서 json 데이터를 파싱한다. 데이터셋에서 모델입력에 필요한 질문, 본문, 정답을 가져오는 함수이다. 그 4 개의 데이터를 class에 넣어주어 __init__()을 해주고 그 다음에 사용하는 것이 위에 작성되어 있는 preprocess 함수이다.
preprocess 함수의 초반부에서는 우선 문자 형식 입력에 문제가 생기지 않도록 문자열로 만들고 split 하고 다시 붙이는 과정을 거친다. 그 후, 길이가 지정한 Input MAXLEN보다 길 경우 학습에 사용하지 않도록 self.skip=True로 지정해주는 것이다. 그 후, tokenizer.encode 함수를 통해 인덱스로 변경되면서 시작 토큰의 위치와 끝 토큰의 위츠를 다시 계산하게끔 한다. 우선 context의 길이만큼변수 is_char_in_ans의 값을 모두 0으로 만들어준다. 그 후, 답이 존재하는 부분을 인덱스에 1로 채워주면 답이 존재하는 모든 인덱스 start_char_idx 부터 end_char_idx 까지가 1로 채워지는 것이다. 이 다음 tokenizer.encode 함수를 사용하여 Encoding을 해주며 새로운 Index 값들을 얻게된다. 새롭게 얻은 index 값에서의 정답 위치를 알아내야 하기 때문에 그 다음 과정을 진행해주고 Attention Mask도 생성해주게 된다.
마지막으로 create_inputs_targets 함수를 사용하게 되는데, 이 때는 dataset_dict 딕셔너리를 만들고 인자에 넣어준 데이터를 사용하여 데이터를 위 형식에 맞춰 넣어주게된다. 여기서 python의 getattr 함수를 사용하게 되는데, 이 함수는 두 개의 인자를 받는다. (Object, name) 위 함수에 넣어준 Object의 Name 속성 값을 가져올 수 있게끔 해주는 함수이다. 이 함수를 사용하여 for 문을 돌면서 dictionary에 하나씩 넣어주고 np.array 형태로 바꿔주는 것이다. 위 Class, function을 사용하여 Train data, Validation data를 아래와 같이 만들어줄 수 있다.
with open(train_path) as f:
    raw_train_data = json.load(f)

with open(eval_path) as f:
    raw_eval_data = json.load(f)


train_squad_examples = create_squad_examples(raw_train_data)
x_train, y_train = create_inputs_targets(train_squad_examples)
print(f"{len(train_squad_examples)} training points created.")

eval_squad_examples = create_squad_examples(raw_eval_data)
x_eval, y_eval = create_inputs_targets(eval_squad_examples)
print(f"{len(eval_squad_examples)} evaluation points created.")

이제 Model을 직접 설계할 단계이다. 이는 다음 시간에 이어서 해보도록 하겠다.
출처:
'Machine Learning > NLP' 카테고리의 다른 글
| KoBART 전이학습 (Colab) (0) | 2022.11.20 |
|---|---|
| BERT - KorQuAD (2) (0) | 2022.11.19 |
| BART: Bidirectional and Auto-Regressive Transformer (0) | 2022.11.12 |
| Text Summarization 시작해보기 (0) | 2022.11.11 |
| BERT 감성분석 (2) (0) | 2022.11.08 |


