
elevne's Study Note
React Native 로 To-Do App 만들기 (3) 본문
이번 시간에는 React Navigation 을 활용하는 방법에 대해 알아보았다. React Navigation 은 React Native 애플리케이션에서 화면을 전환하고 탐색하기 위해 사용되는 라이브러리이다. 이를 사용하면 사용자가 화면 간에 이동할 수 있도록 스택, 탭 또는 드로어 형태의 네비게이션을 구성할 수 있다고 한다. 우선 이를 아래 명령어를 통해서 다운 받는다.
npm install @react-navigation/native @react-navigation/native-stack

npm install react-native-screens react-native-safe-area-context
React Navigation 을 사용할 때 우선 App.js 에서 @react-navigation/native-stack 의 createNativeStackNavigator 과 @react-navigation/native 의 NavigationContainer 이 사용된다. createNativeStackNavigator 은 Screen 과 Navigator 의 2 가지 속성을 포함하는 객체를 반환하는 함수이다. 둘 다 네비게이터를 구성하는 데 사용되는 React 의 구성요소이다. Navigator 은 경로에 대한 구성을 정의하기 위해 Screen 요소를 자식으로 포함해야 한다고 한다. NavigationContainer 은 탐색 트리를 관리하고 탐색 상태를 포함하는 구성요소이다. 이 구성 요소는 모든 네비게이터 구조를 래핑해야 한다. 일반적으로 앱의 루트에서 이 구성 요소를 렌더링한다고 한다.
import { StatusBar } from 'expo-status-bar';
import React from 'react';
import { StyleSheet, Text, View } from 'react-native';
import { Provider } from 'react-redux';
import { store } from './redux/store';
import MainScreen from './screens/MainScreen';
import { createNativeStackNavigator } from '@react-navigation/native-stack';
import { NavigationContainer } from '@react-navigation/native';

const Stack = createNativeStackNavigator();

export default function App() {
  return (
    <Provider store={store}>
      <NavigationContainer>
        <Stack.Navigator>
          <Stack.Screen name="Main" component={MainScreen}/>
          {/* <Stack.Screen name="Login" component={LoginScreen} /> */}
        </Stack.Navigator>
      </NavigationContainer>
    </Provider>
  );
}

const styles = StyleSheet.create({
  container: {
    flex: 1,
    backgroundColor: '#fff',
    alignItems: 'center',
    justifyContent: 'center',
  },
});
위와 같은 형식으로 작성되는 것이다. screens 폴더 내에 LoginScreen.js 파일도 만들어서 주석을 해제해주면 된다.
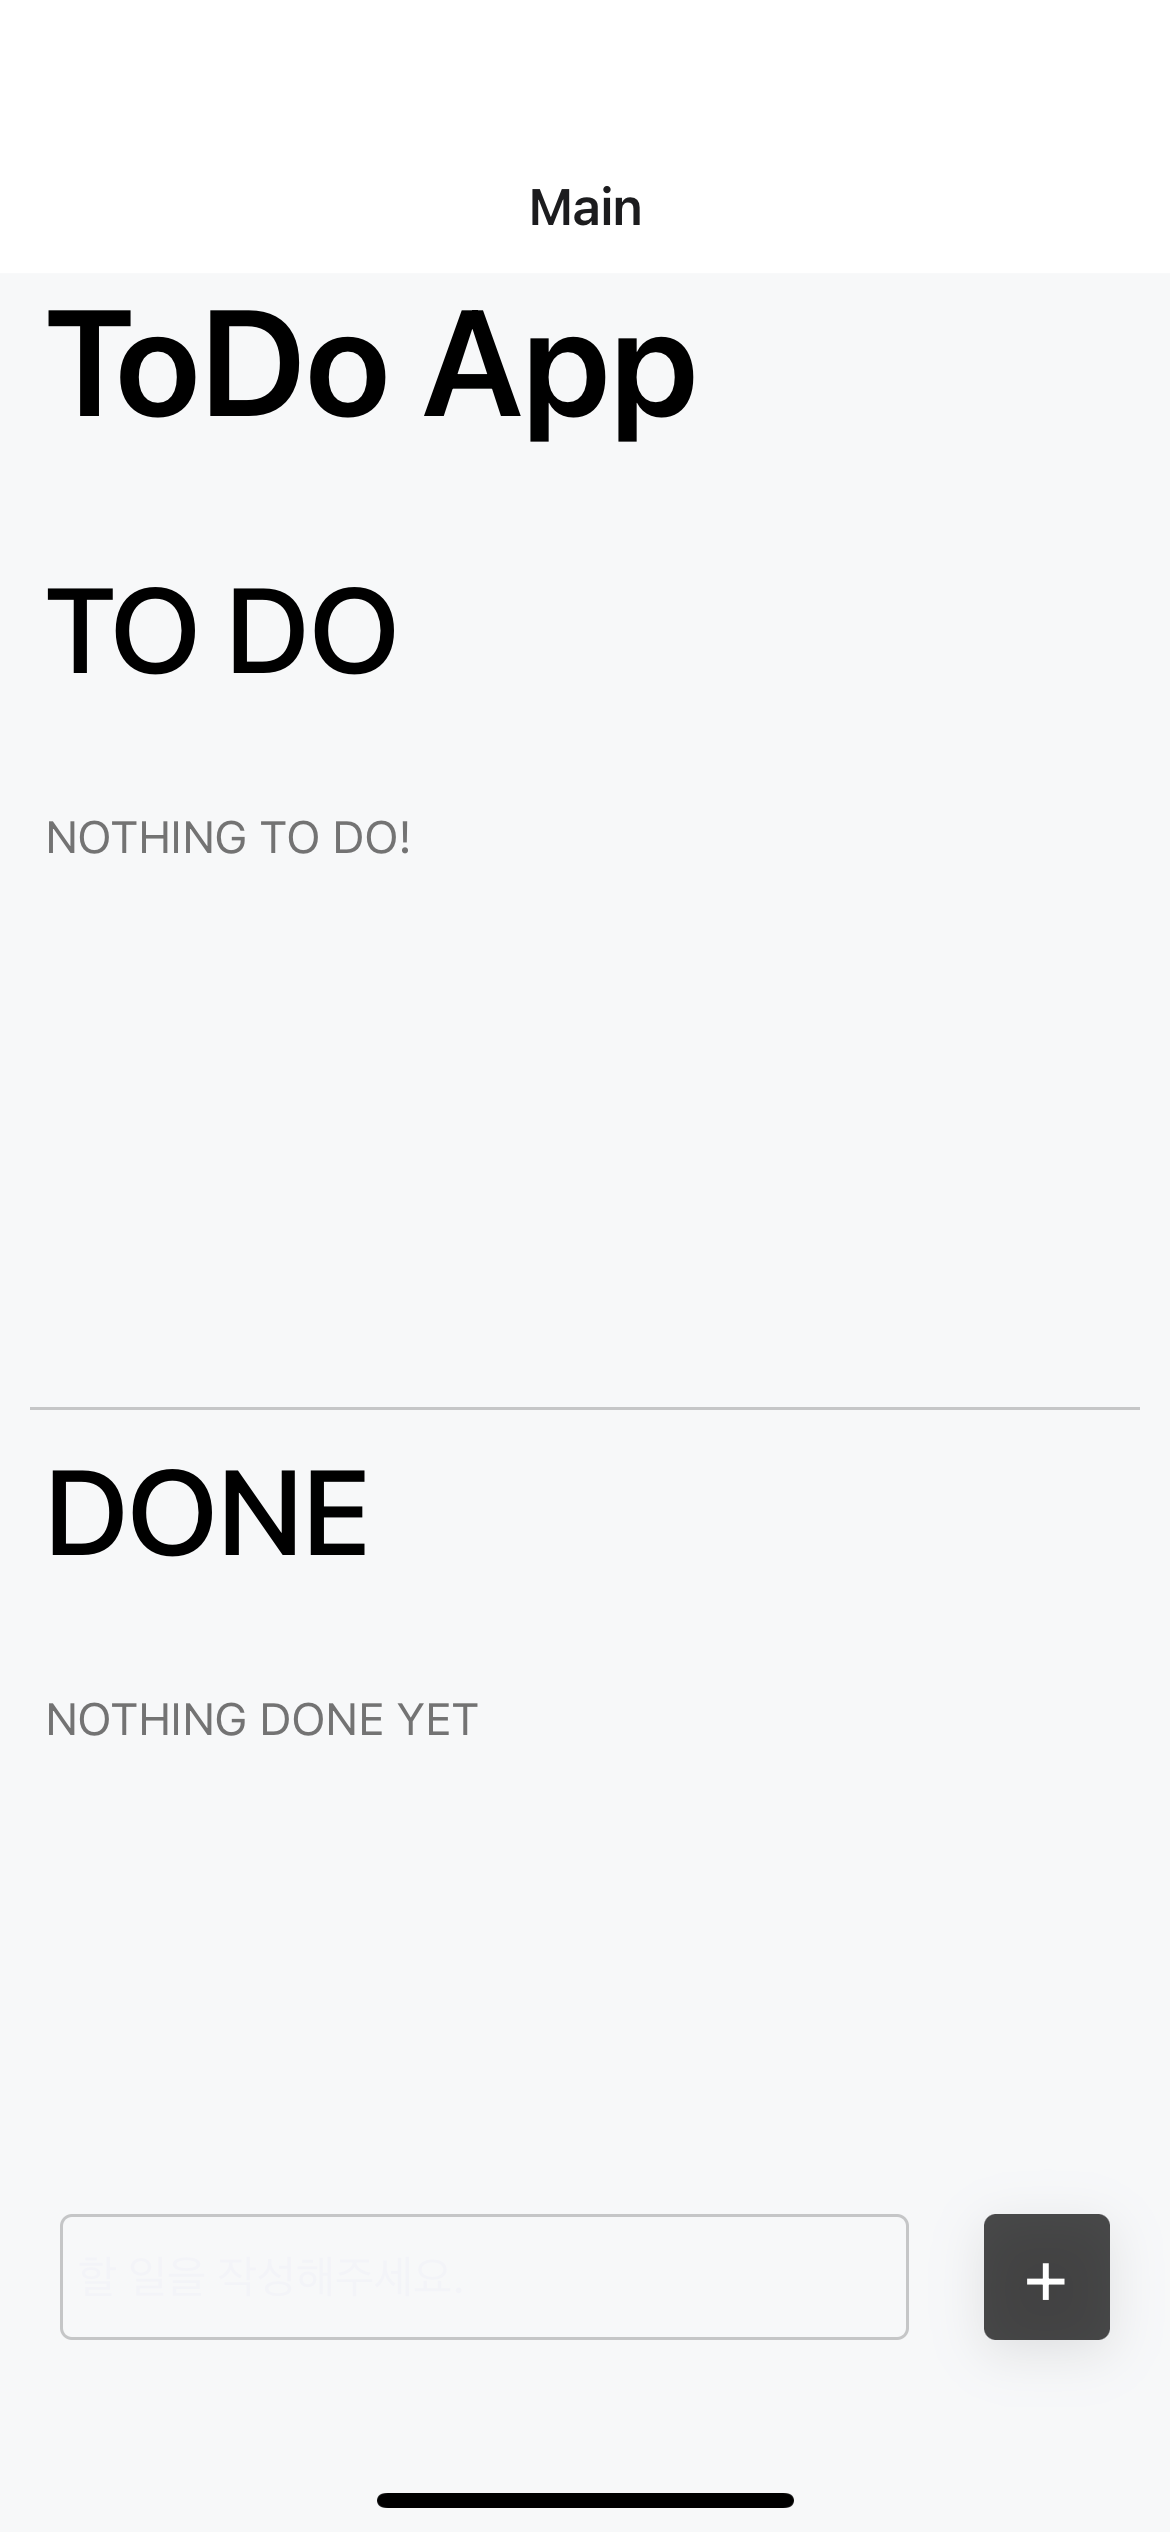
이렇게만 작성하고 코드를 실행해보면, 메인 스크린위에 Main 이라는 텍스트가 적힌 헤더가 생성되어 있는 것을 확인할 수 있다. 이는 NavigationContainer 안의 Stack.Navigator 안의 Stack.Screen 의 name 이 Main 으로 되어있기 때문이다. 이 헤더를 없애기 위해서 아래와 같이 코드를 약간만 수정해줄 수 있다.
import { StatusBar } from 'expo-status-bar';
import React from 'react';
import { StyleSheet, Text, View } from 'react-native';
import { Provider } from 'react-redux';
import { store } from './redux/store';
import MainScreen from './screens/MainScreen';
import { createNativeStackNavigator } from '@react-navigation/native-stack';
import { NavigationContainer } from '@react-navigation/native';
import LoginScreen from './screens/LoginScreen';

const Stack = createNativeStackNavigator();

export default function App() {
  return (
    <Provider store={store}>
      <NavigationContainer>
        <Stack.Navigator>
          <Stack.Screen options={{headerShown:false}} name="Main" component={MainScreen}/>
          <Stack.Screen name="Login" component={LoginScreen} />
        </Stack.Navigator>
      </NavigationContainer>
    </Provider>
  );
}

const styles = StyleSheet.create({
  container: {
    flex: 1,
    backgroundColor: '#fff',
    alignItems: 'center',
    justifyContent: 'center',
  },
});
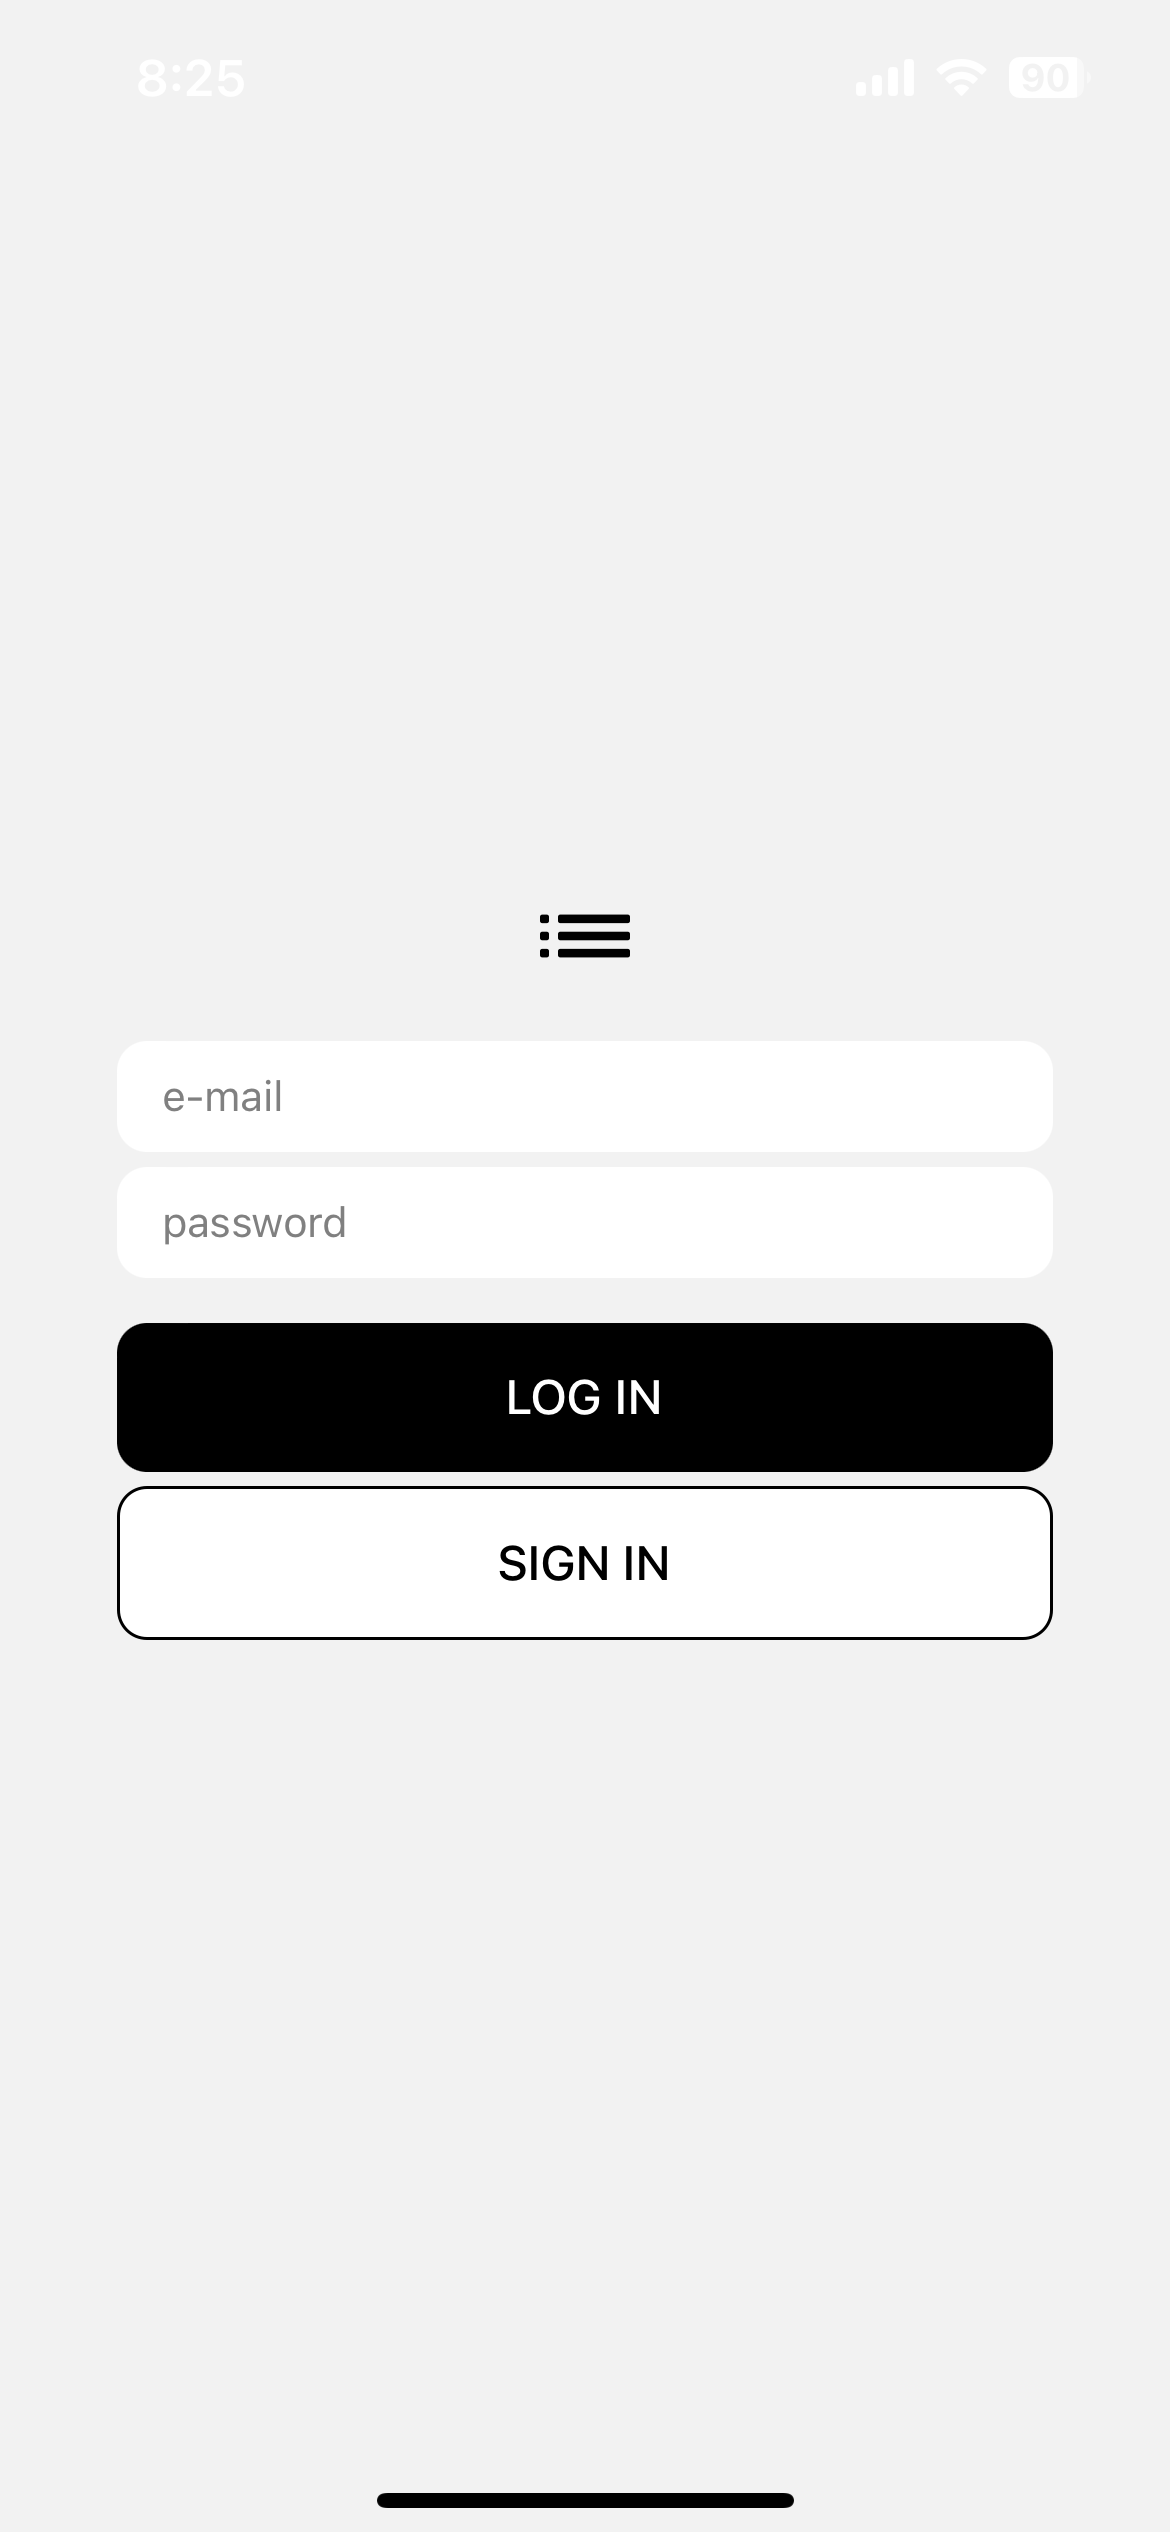
바로 헤더가 사라지는 것을 확인할 수 있다. 그 다음으로는 LoginScreen 의 코드를 제대로 작성할 차례였다.
import { StyleSheet, Text, TextInput, TouchableOpacity, View } from 'react-native'
import React, { useState } from 'react'
import ListIcon from "../assets/list.svg"

const LoginScreen = () => {
  const [email, setEmail] = useState("");
  const [password, setPassword] = useState("");
  return (
    <View style={styles.container}>
      <ListIcon />
      <View style={styles.inputContainer}>
        <TextInput
            placeholder="e-mail"
            placeholderTextColor={"grey"}
            value={email}
            onChangeText={text => setEmail(text)}
            style={styles.input}
        />
        <TextInput
            placeholder='password'
            placeholderTextColor={"grey"}
            value={password}
            onChangeText={text => setPassword(text)}
            style={styles.input}
            secureTextEntry={true}
        />
      </View>
      <View style={styles.inputContainer}>
        <TouchableOpacity
            style={styles.button}

        >
            <Text style={styles.buttonText}>LOG IN</Text>
        </TouchableOpacity>
        <TouchableOpacity
            style={[styles.button, styles.buttonOutline]}

        >
            <Text style={styles.buttonOutlineText}>SIGN IN</Text>
        </TouchableOpacity>
      </View>
    </View>
  )
}

export default LoginScreen

const styles = StyleSheet.create({
    container: {
        flex: 1,
        justifyContent: "center",
        alignItems: "center"
    },
    inputContainer: {
        width: "80%",
        marginTop: 15,
    },
    input: {
        backgroundColor: "white",
        paddingHorizontal: 15,
        paddingVertical: 10,
        borderRadius: 10,
        marginTop: 5,
    },
    buttonContainer: {
        width: "50%",
        justifyContent: "center",
        alignItems: "center",
        marginTop: 30
    },
    button: {
        backgroundColor: "black",
        width: "100%",
        padding: 15,
        borderRadius: 10,
        alignItems: "center",
    },
    buttonOutline: {
        backgroundColor: "white",
        marginTop: 5,
        borderColor: "black",
        borderWidth: 1
    },
    buttonText: {
        color: "white",
        fontWeight: 500,
        fontSize: 16
    },
    buttonOutlineText: {
        color: "black",
        fontWeight: "500",
        fontSize: 16
    }
})
Password 를 받는 TextInput 에서 사용된 secureTextEntry 는 입려되는 비밀번호를 가려주는 역할을 한다. 또, 사용된 TouchableOpacity 컴포넌트는 press-down 이 있을 때 투명도가 낮아지게끔 해주는 기능이 추가되어 있다. (Pressable 과 유사)
다음 시간에는 firebase 를 활용하여 실제 로그인을 구현해볼 예정이다.
'Frontend > React Native' 카테고리의 다른 글
| RN E-Commerce App Clone: Animated, Moti (0) | 2023.06.26 |
|---|---|
| React Native 로 To-Do App 만들기 (4) (0) | 2023.04.24 |
| React Native 로 To-Do App 만들기 (2) (0) | 2023.03.26 |
| React Native: Redux (2) (0) | 2023.03.25 |
| React Native: Redux (0) | 2023.03.24 |


