
elevne's Study Note
React Native (4-4: RN 컴포넌트 알아보기(PanResponder, Animated)) 본문
React Native (4-4: RN 컴포넌트 알아보기(PanResponder, Animated))
elevne 2023. 2. 22. 23:28PanResponser 는 TouchableHighlight, Pressable, Button 등과 다르게 컴포넌트가 아니라 React Native 에서 제공하는 하나의 API로 여러 터치를 하나의 제스처로 조정해준다. 이는 Extra Touch 들에 대해 탄력적인 Single-Toch 를 만들어주고, 기본적인 Multi-Touch Gesture 을 인식하는데 사용될 수 있다고 한다. PanResponder gestureState 객체를 사용하여 현재 제스처의 속도, 누적 이동거리 등과 같은 원시 위치 데이터에 접근할 수 있다. 아래와 같은 형식으로 PanResponder 의 함수를 사용할 수 있다.
onPanResponderMove: (event, gestureState) => {}
위 코드에서 사용되는 event 는 native event object 로, PressEvent 형태의 합성 터치 이벤트라고 한다. 또, gestureState 는 아래와 같은 것들을 가진다.
| stateID | Gesture 상태의 ID |
| moveX | 마지막으로 이동한 터치의 화면 좌표 (x) |
| moveY | 마지막으로 이동한 터치의 화면 좌표 (y) |
| x0 | 응답자 부여의 화면 좌표 (x) |
| y0 | 응답자 부여의 화면 좌표 (y) |
| dx | 터치가 시작된 이후 제스처의 누적거리 (x) ( dx = x0 + dx ) |
| dy | 터치가 시작된 이후 제스처의 누적거리 (y) ( dy = y0 + dy ) |
| vx | 현재 속도 (x) |
| vy | 현재 속도 (y) |
| numberActiveTouches | 현재 화면의 터치 수 |
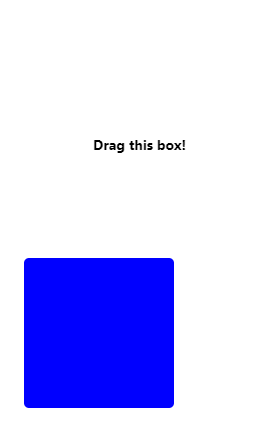
PanResponder 은 복잡한 제스처를 처리하기 위해 Animated API 와 같이 사용된다. 아래와 같이 코드를 작성해볼 수 있다.
import React, {useRef} from 'react';
import {Animated, View, StyleSheet, PanResponder, Text} from 'react-native';

const App = () => {
  const pan = useRef(new Animated.ValueXY()).current;

  const panResponder = useRef(
    PanResponder.create({
      onMoveShouldSetPanResponder: () => true,
      onPanResponderMove: Animated.event([null, {dx: pan.x, dy: pan.y}]),
      onPanResponderRelease: () => {
        pan.extractOffset();
      },
    }),
  ).current;

  return (
    <View style={styles.container}>
      <Text style={styles.titleText}>Drag this box!</Text>
      <Animated.View
        style={{
          transform: [{translateX: pan.x}, {translateY: pan.y}],
        }}
        {...panResponder.panHandlers}>
        <View style={styles.box} />
      </Animated.View>
    </View>
  );
};

const styles = StyleSheet.create({
  container: {
    flex: 1,
    alignItems: 'center',
    justifyContent: 'center',
  },
  titleText: {
    fontSize: 14,
    lineHeight: 24,
    fontWeight: 'bold',
  },
  box: {
    height: 150,
    width: 150,
    backgroundColor: 'blue',
    borderRadius: 5,
  },
});

export default App;
위와 같이 컴포넌트 내에서 create 메서드, 그 안에 사용할 함수들을 작성하여 사용한다. onStartShouldSetPanResponder, onMoveShouldSetPanResponder 함수는 주어진 터치 이벤트에 반응할지를 결정한다. onPanResponderGrant 는 터치 이벤트가 발생할 때 실행, onPanResponderRelease, onPanResponderTerminate 는 터치이벤트가 끝날 때 실행된다. 또, 터치 이벤트가 진행 중일 때는 onPanResponderMove 를 통해 터치 정보를 확인할 수 있다.
또, 위에서 PanResponder 은 Animated 와 함께 사용된다고 했다. Animated 라이브러리는 애니메이션을 유연하고 강력하며 제작 및 유지관리에 어려움이 없도록 설계되었다. Animated 는 입력과 출력 사이의 Declarative Relation, 그 사이의 구성 가능한 변환, 시간 기반 애니메이션 실행을 제어하는 시작/정지 방법에 초점을 맞춘다고 한다. 그래서, 애니메이션을 구현하기 위한 핵심은 Animated.Value 를 만들고 Style attribute 나 animated component 에 연결하여 Animated.timing() 을 사용하여 업데이트를 수행하는 것이다. 아래는 Animated 를 사용한 코드 예시이다.
import React, {useRef} from 'react';
import {
  Animated,
  Text,
  View,
  StyleSheet,
  Button,
  SafeAreaView,
} from 'react-native';

const App = () => {
  // fadeAnim will be used as the value for opacity. Initial Value: 0
  const fadeAnim = useRef(new Animated.Value(0)).current;

  const fadeIn = () => {
    // Will change fadeAnim value to 1 in 5 seconds
    Animated.timing(fadeAnim, {
      toValue: 1,
      duration: 5000,
      useNativeDriver: true,
    }).start();
  };

  const fadeOut = () => {
    // Will change fadeAnim value to 0 in 3 seconds
    Animated.timing(fadeAnim, {
      toValue: 0,
      duration: 3000,
      useNativeDriver: true,
    }).start();
  };

  return (
    <SafeAreaView style={styles.container}>
      <Animated.View
        style={[
          styles.fadingContainer,
          {
            // Bind opacity to animated value
            opacity: fadeAnim,
          },
        ]}>
        <Text style={styles.fadingText}>Fading View!</Text>
      </Animated.View>
      <View style={styles.buttonRow}>
        <Button title="Fade In View" onPress={fadeIn} />
        <Button title="Fade Out View" onPress={fadeOut} />
      </View>
    </SafeAreaView>
  );
};

const styles = StyleSheet.create({
  container: {
    flex: 1,
    alignItems: 'center',
    justifyContent: 'center',
  },
  fadingContainer: {
    padding: 20,
    backgroundColor: 'powderblue',
  },
  fadingText: {
    fontSize: 28,
  },
  buttonRow: {
    flexBasis: 100,
    justifyContent: 'space-evenly',
    marginVertical: 16,
  },
});

export default App;

ReactNative 에서는 애니메이션에 사용할 수 있는 4 가지의 컴포넌트 (Animated.Image, Animated.ScrollView, Animated.Text, Animated.View) 를 제공한다. 또, 세 가지의 애니메이션 타입이 있다. Timing 은 시간이 지남에 따라 값을 Animate 하는 것, Spring 은 간단한 스프링 물리 모델을 제공하는 것, 그리고 Decay 는 초기 속도로 시작하여 점차 정지하는 것이다. Scale, Opacity, toValue, Duration 등 다양한 속성을 사용할 수 있다.
마지막으로, 위에서 계속 사용된 useRef 에 대해서 알아보았다. useRef 는 .current 속성이 전달된 인수(InitialValue)로 초기화된 가변 참조 개체를 반환한다. 반환된 개체는 구성 요소의 전체 수명 동안 유지된다. useRef 는 .current 속성에서 변경 가능한 값을 보유할 수 있는 상자와 같다고 한다. <div ref={myRef} /> 와 같이 작성하여 ref 객체를 전달하면 해당 노드가 변경될 때마다 React 의 .current 속성이 해당 DOM 노드로 설정되는 것이다. 아래는 useRef 를 활용한 예시 코드이다.
import React, { useState, useRef } from "react";

function ManualCounter() {
  const [count, setCount] = useState(0);
  const intervalId = useRef(null);
  console.log(`랜더링... count: ${count}`);

  const startCounter = () => {
    intervalId.current = setInterval(
      () => setCount((count) => count + 1),
      1000
    );
    console.log(`시작... intervalId: ${intervalId.current}`);
  };

  const stopCounter = () => {
    clearInterval(intervalId.current);
    console.log(`정지... intervalId: ${intervalId.current}`);
  };

  return (
    <>
      <p>자동 카운트: {count}</p>
      <button onClick={startCounter}>시작</button>
      <button onClick={stopCounter}>정지</button>
    </>
  );
}
Reference:
https://www.daleseo.com/react-hooks-use-ref/
https://velog.io/@he0_077/React-Native-PanResponder
https://www.devh.kr/2020/Introduction-to-animation-in-React-Native/
빠른 모바일 앱 개발을 위한 React Native

'Frontend > React Native' 카테고리의 다른 글
| React Native (4-6: RN 컴포넌트 알아보기(SectionList, Switch)) (0) | 2023.02.25 |
|---|---|
| React Native (4-5: RN 컴포넌트 알아보기(FlatList, ActivityIndicator)) (0) | 2023.02.24 |
| React Native (4-3: RN 컴포넌트 알아보기(Button, TouchableHighlight, Pressable)) (0) | 2023.02.21 |
| React Native (4-2: RN 컴포넌트 알아보기(Image)) (0) | 2023.02.20 |
| React Native (4-1: RN 컴포넌트 알아보기(Text)) (0) | 2023.02.19 |


